• About
  • Sponsor / PR
  • Contact
    • Email
    • Facebook
    • Instagram
    • Pinterest
    • Twitter

Houston Mommy and Lifestyle Blogger | Moms Without Answers

We don't have all the answers, but we have all the fun

  • Mom
    • Parenting
    • Mom Life
    • Faith
    • Fashion/Beauty
    • Health
    • Blogging
  • Kiddos
    • Kids Activities
    • Kid Fashion
    • Family Fun
  • Recipes
    • Breakfast
    • Lunch
    • Dinner
    • Appetizers & Sides
    • Sweet Treats
  • Projects
    • DIY & Crafts
    • Home Decor
    • Cleaning & Organization
  • Celebrate
    • Holidays
    • Parties
    • Gifts
  • Shop My FAVES

Easy DIY Wooden Farmhouse Sign

July 8, 2016 By Channing 31 Comments

You guys, I am so excited to share this super fun DIY with you today. Like the rest of the world right now, I am obsessed with Fixer Upper on HGTV. I am so obsessed it may be border line creepy.

Did you know that I am totally like BFF’s with Chip and Joanna? I am, I really am…they just don’t know it yet.

Obviously I know we are not friends but I sure do love their decor style. I have always been a huge fan of the Farmhouse Rustic style and the way they execute it is just pure perfection!

One of the design pieces I am loving the most are Wooden Signs. I love the idea of words in our home being a reflection of who we are as a family. These signs are gorgeous but oh so expensive. Because I did not want to spend an arm and a leg on one of the beauties I knew I had to figure out how to make my own.

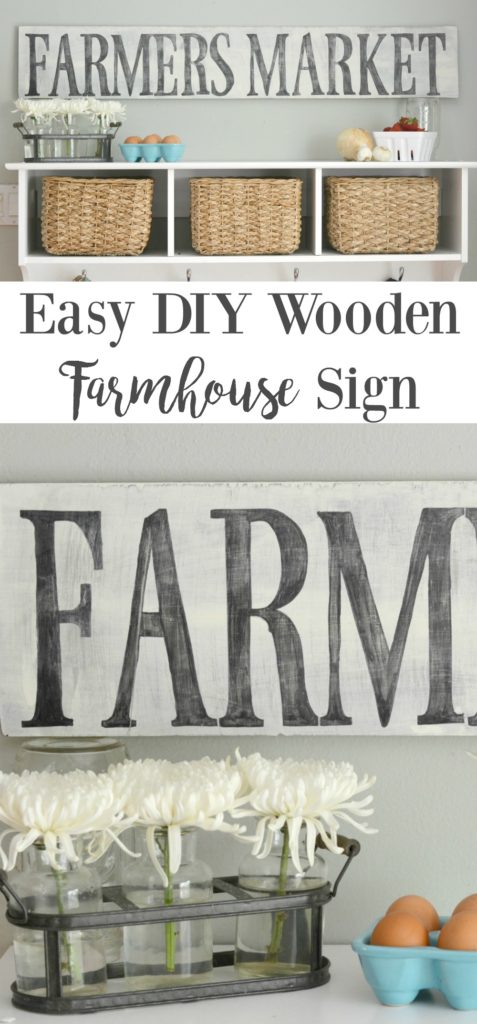
Today I am sharing with you 2 techniques to make these Easy DIY Wooden Farmhouse Signs. I am telling you friends, these techniques are so easy my kids even helped. And no, I did not have to freehand the lettering!

Easy DIY Wooden Sign - this tutorial is very easy to follow. DIY Wooden sign with frame. Rustic wooden sign with saying.

Farmhouse Sign Technique #1

The first technique I used in creating one of my signs was by using modge podge. I know, so easy!

Here is what you need to create your own:

1 sheet of plywood (my board is a 30in X 40in)

2- 2in X 4in pieces of 30 in prime white wood stud

2- 2in X 4in pieces of 32 in prime white wood stud

Wood Glue

White Chalk Paint

Foam Paint Brush

Stain of Choice- I used a grey stain

Old T-shirt

Wet Rag

Printer

Favorite Font

Sand Paper

Easy DIY Wooden Sign - this tutorial is very easy to follow. DIY Wooden sign with frame. Rustic wooden sign with saying.

Let’s get started!

Before we can get to the fun part we have to create our canvas. We are using a chalk paint for these pieces of art because it is more porous. First things first, sand down your plywood so the paint will stick to the wood now paint the plywood with your chalk paint. Make sure that you cover it well. Once your board is painted it is time to stain your frame. Using your old t-shirt dab it into the stain and rub it into the wood studs. You can do as many layers of stain as you wish to make it as dark as you want but make sure each layer is completely dry before applying the next.

Once all pieces of wood are dry it is time to apply the studs to the plywood. Using wood glue, we are going to adhere the studs directly to the plywood. The 30 in pieces will go on the 30 in side of plywood and the 32 on the 40 in side. Apply a generous amount of wood glue to the back of the stud and glue onto the plywood. Repeat this step with each stud until all are glued down. You may want to use heavy books or something heavy to ensure that they seal correctly. Allow this to dry over night.

Now for the fun part, the wording!

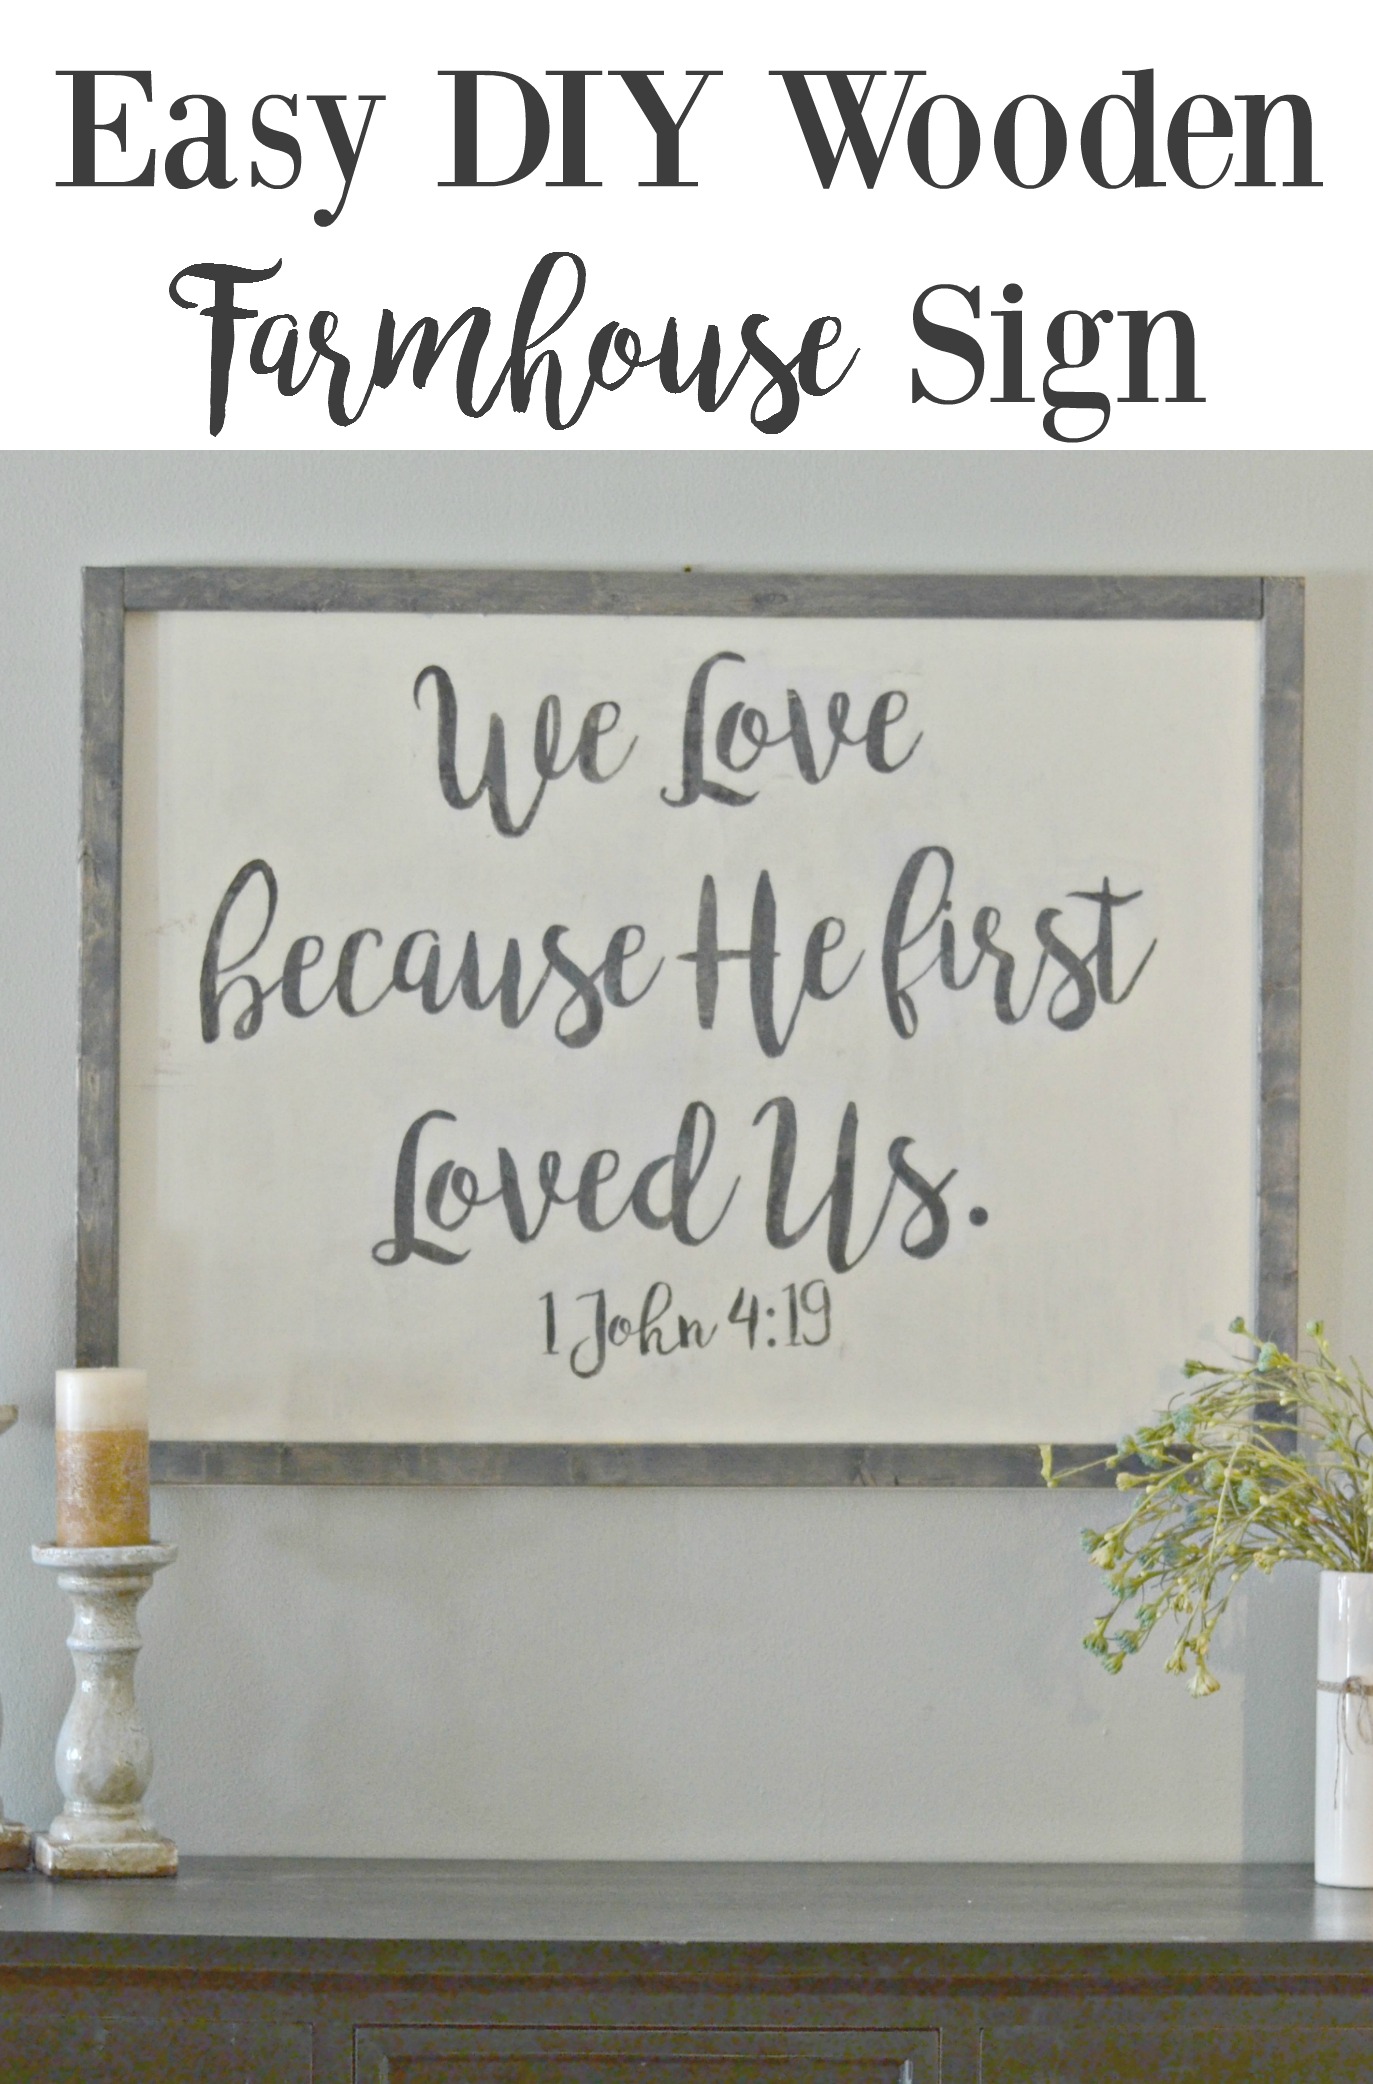
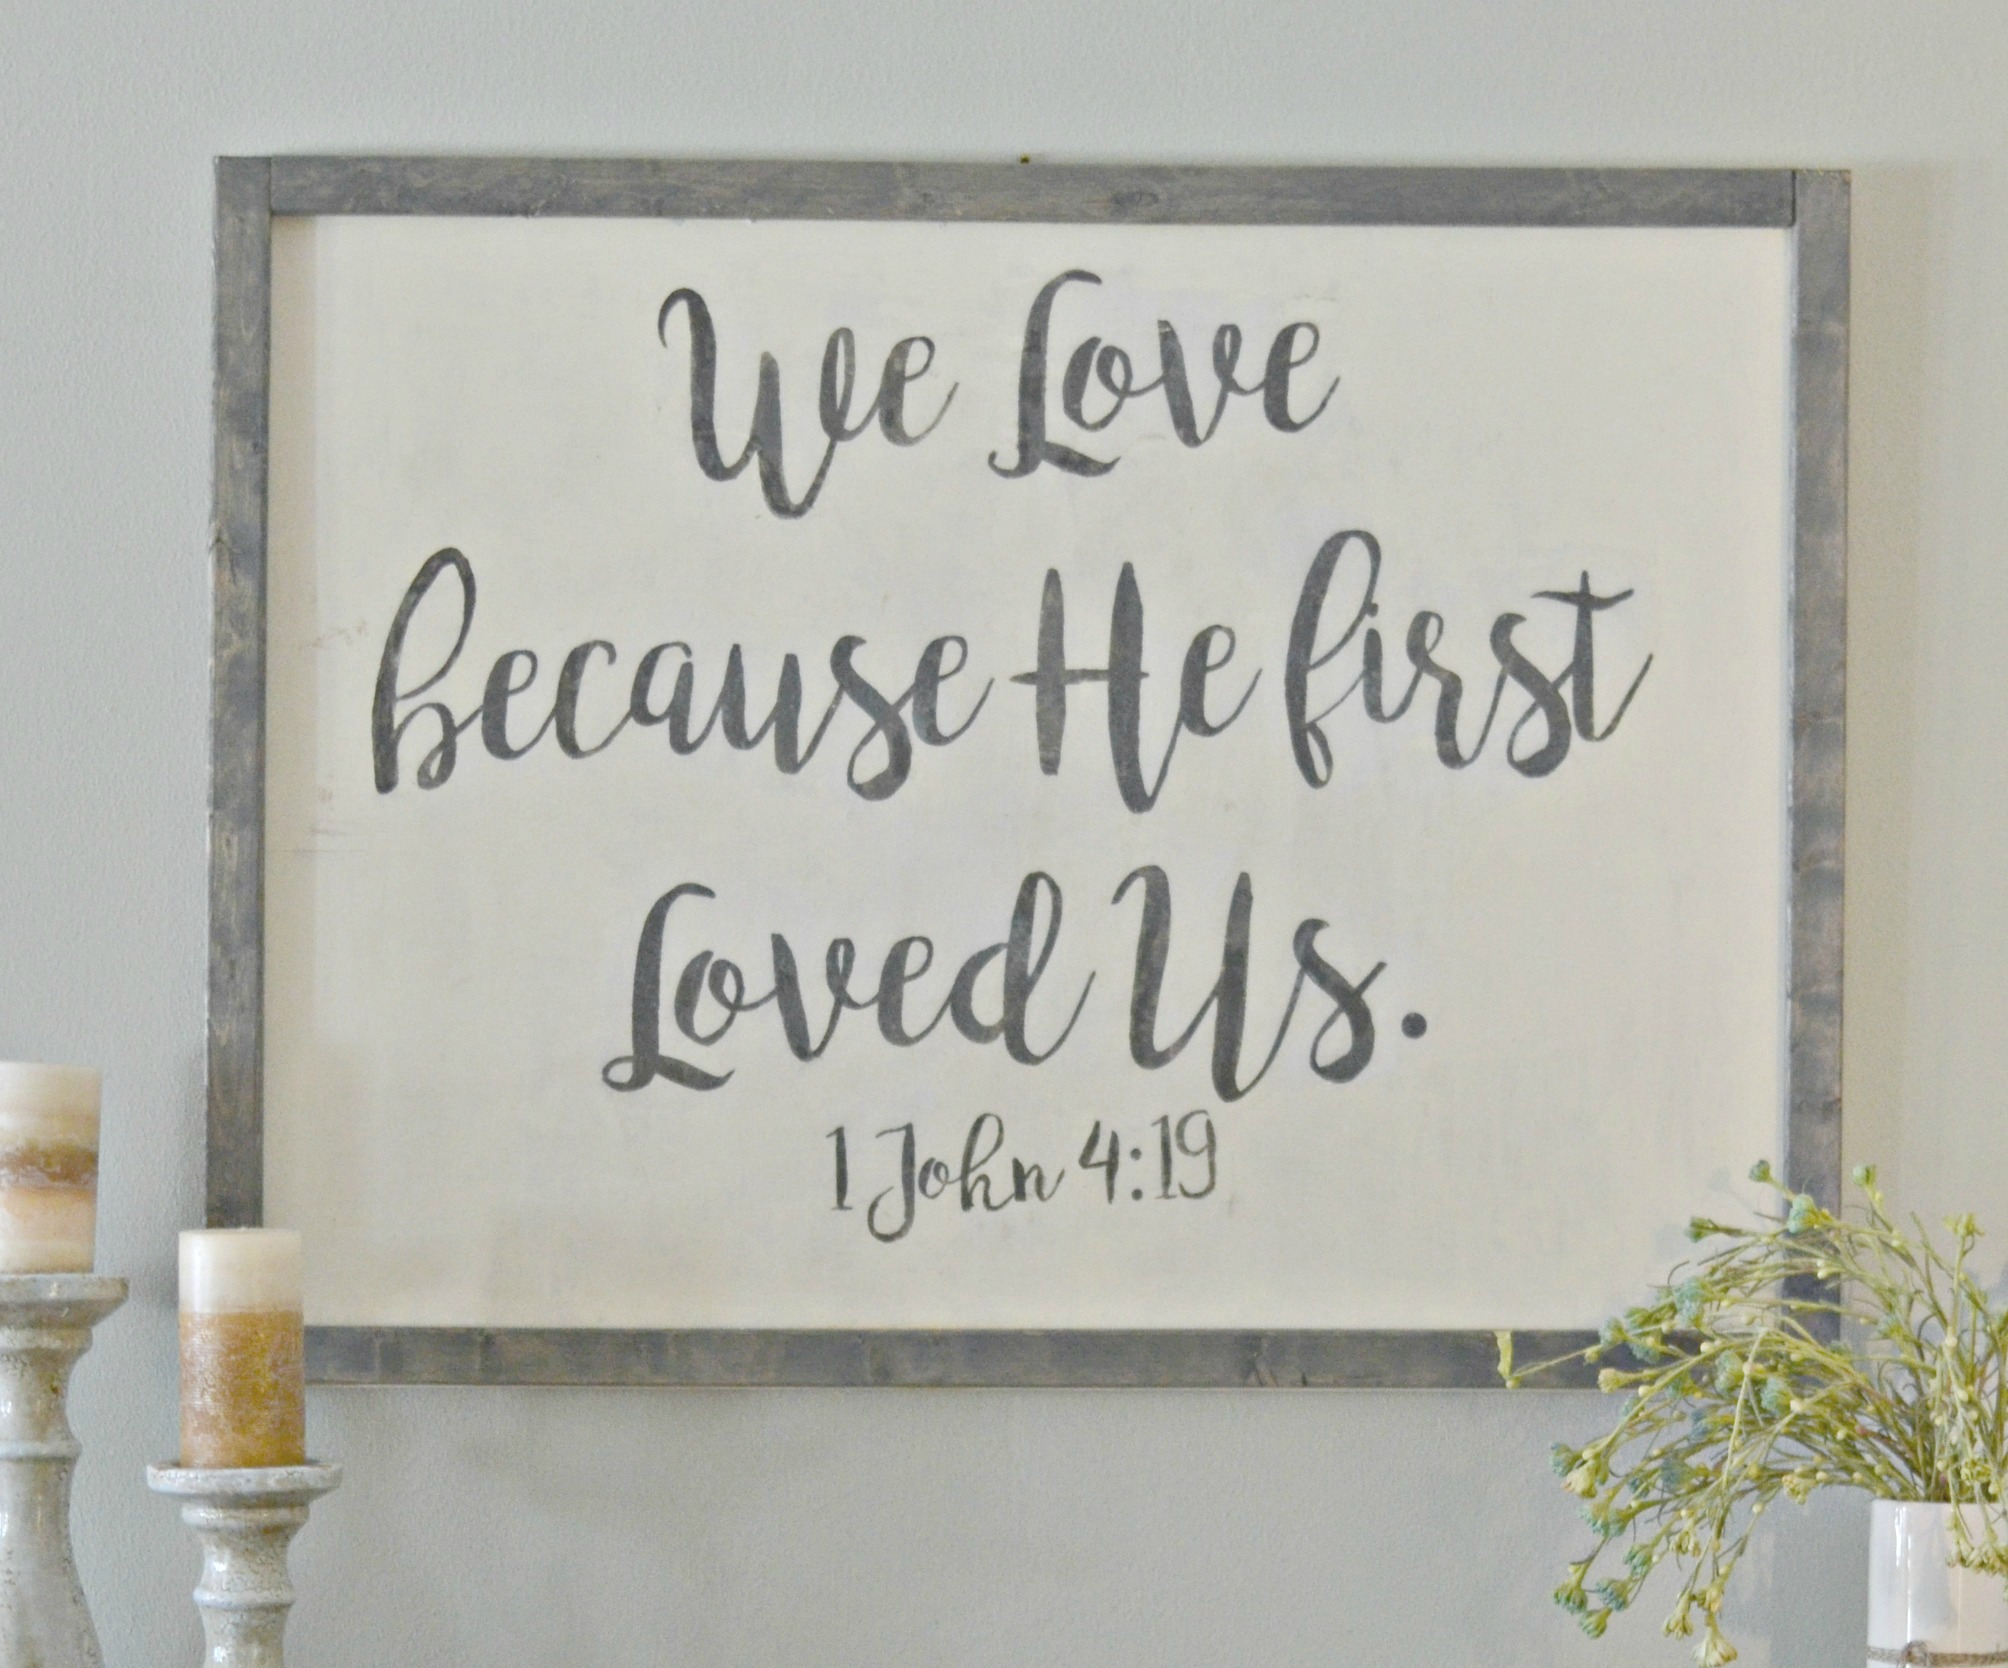
For our sign I wanted to do a Bible verse. I wanted a verse that reflects our family and one that is a constant reminder of who we are as a family. I chose 1 John 4:19, ” We Love because He first Loved Us.” I absolutely love it!

Once you find the verse or phrase you want to use for your sign it is time to find a font. Remember that this is something you are hanging in your home so make sure choose a font you LOVE. Do not be afraid to purchase a new font! After you have found your font and your wording it is time to figure out spacing. I created mine in PicMonkey. Create a new design and then flip it mirror image. Here is a free printable of the one I used if you like it!

1 JOhn 4:19 Mirrored Printable

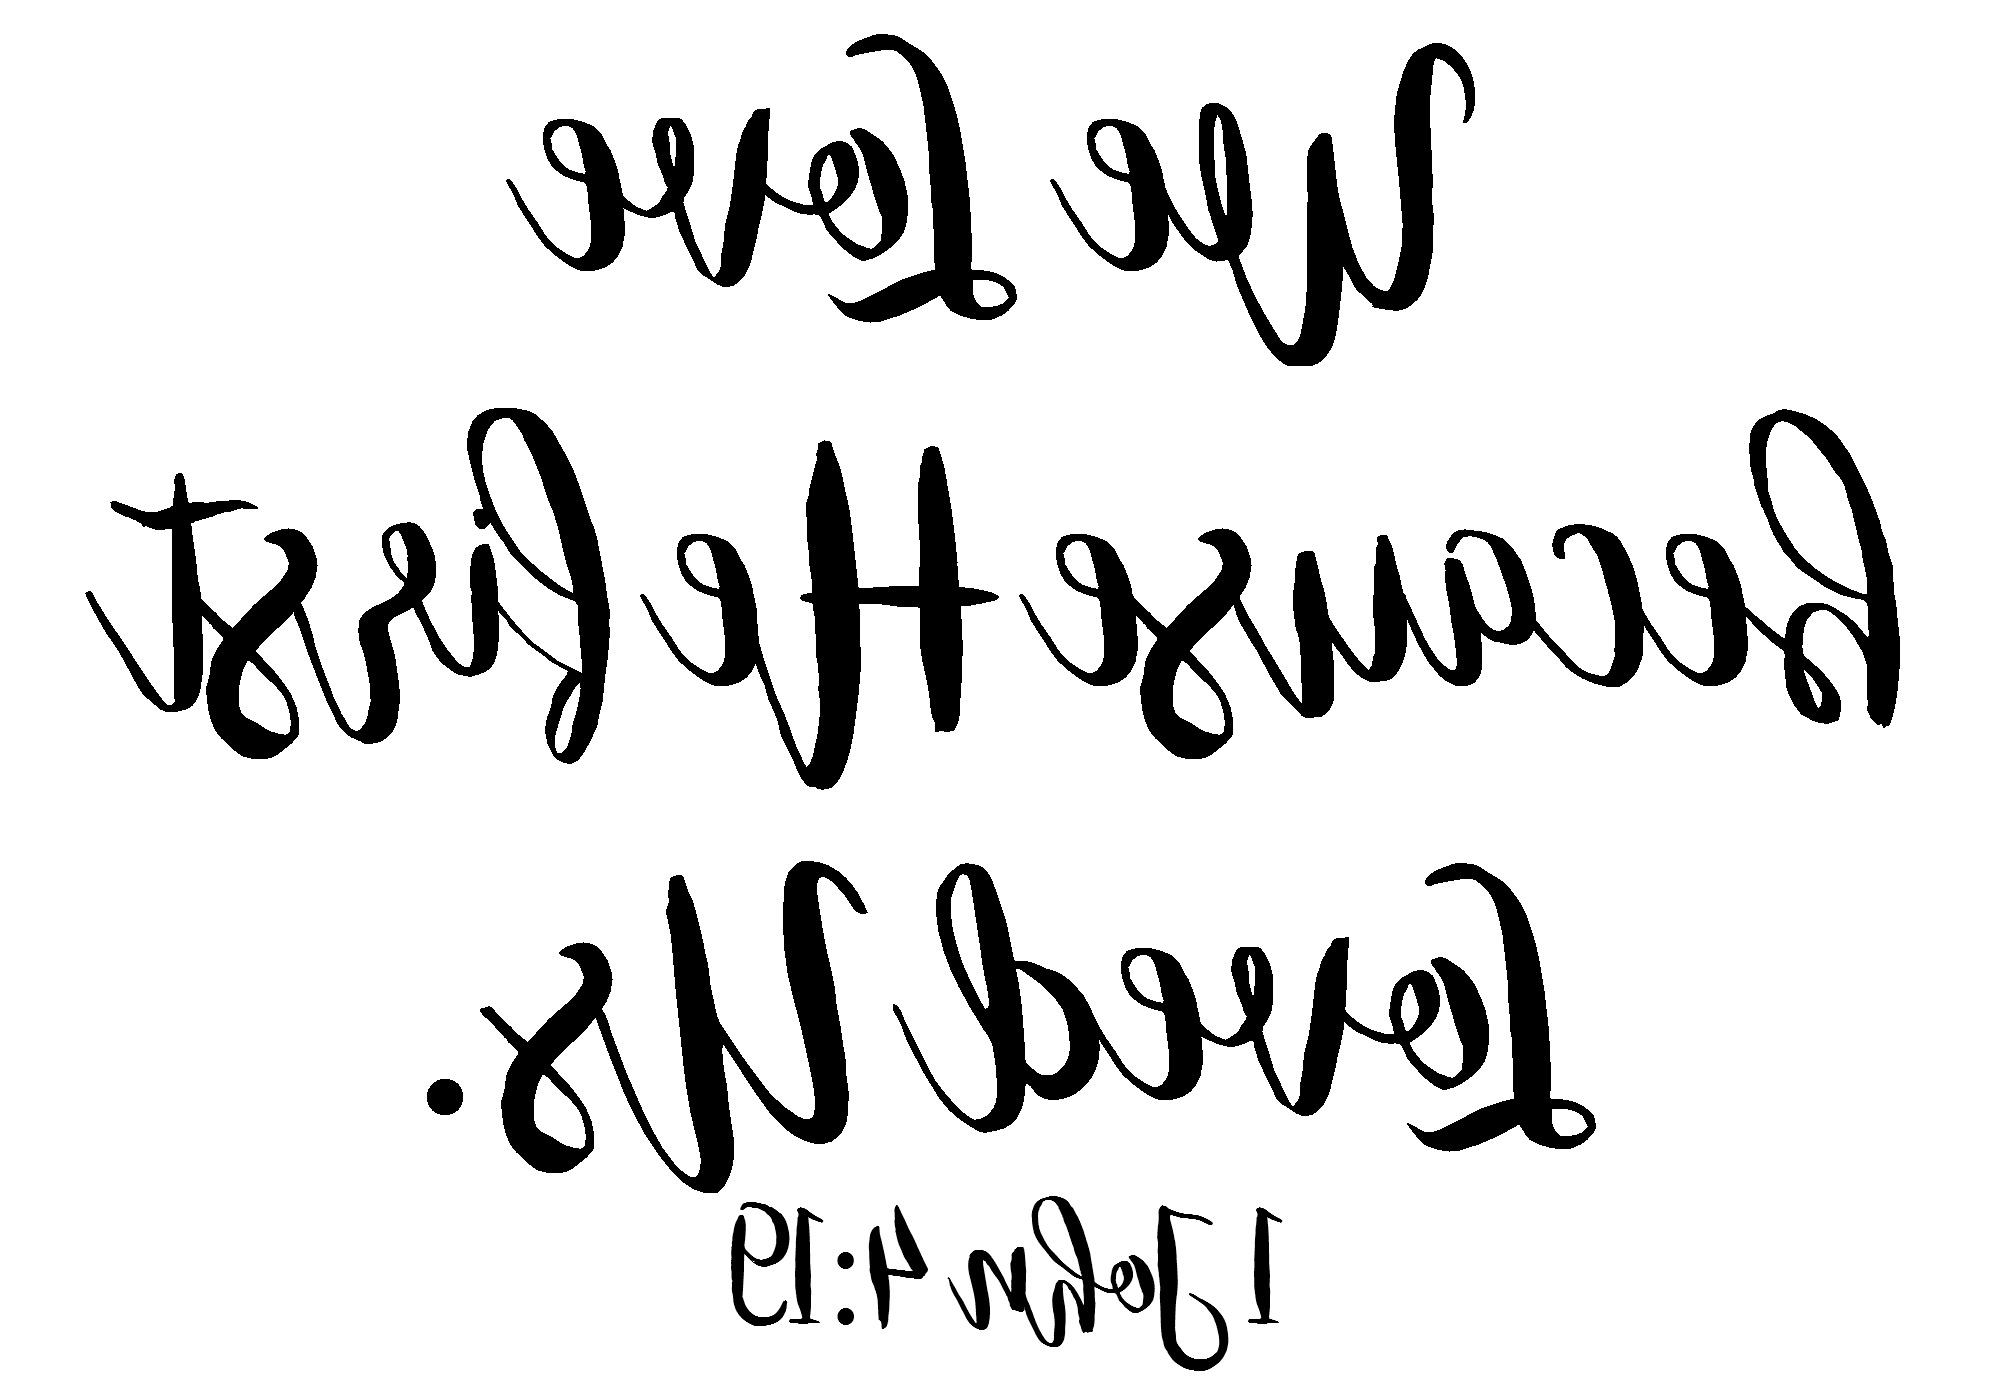
Once your wording is created in mirror image it is time to print it. I had mine printed in a poster size on regular printer style paper. Now, here is an important step. Before you move forward, cut off as much excess paper as possible.

One the side that your lettering is paint on a generous amount of modge podge. Once the lettering is covered flip it over and apply it to your framed board. Let dry completely.

After the paper is dry take your wet rag and gently remove the back of the paper. What will begin to happen is the back layer of the paper will come off and the modge podged letters will stay! It’s like magic!

Remove as much paper as possible. If your sign does like mine, you may have to go back and paint in any spot that may have pulled off or you could get lucky and the entire print will adhere perfectly!

Below is the tutorial I watched in order to master this technique!


Friends, this was so easy to do and did not take a lot of time at all. To purchase a sign this big I would have been looking at well around $400. By the time I purchased all of my supplies I did this sign for about $60. I would say that is a pretty good savings! I also love that I got to customize it completely to match my home.

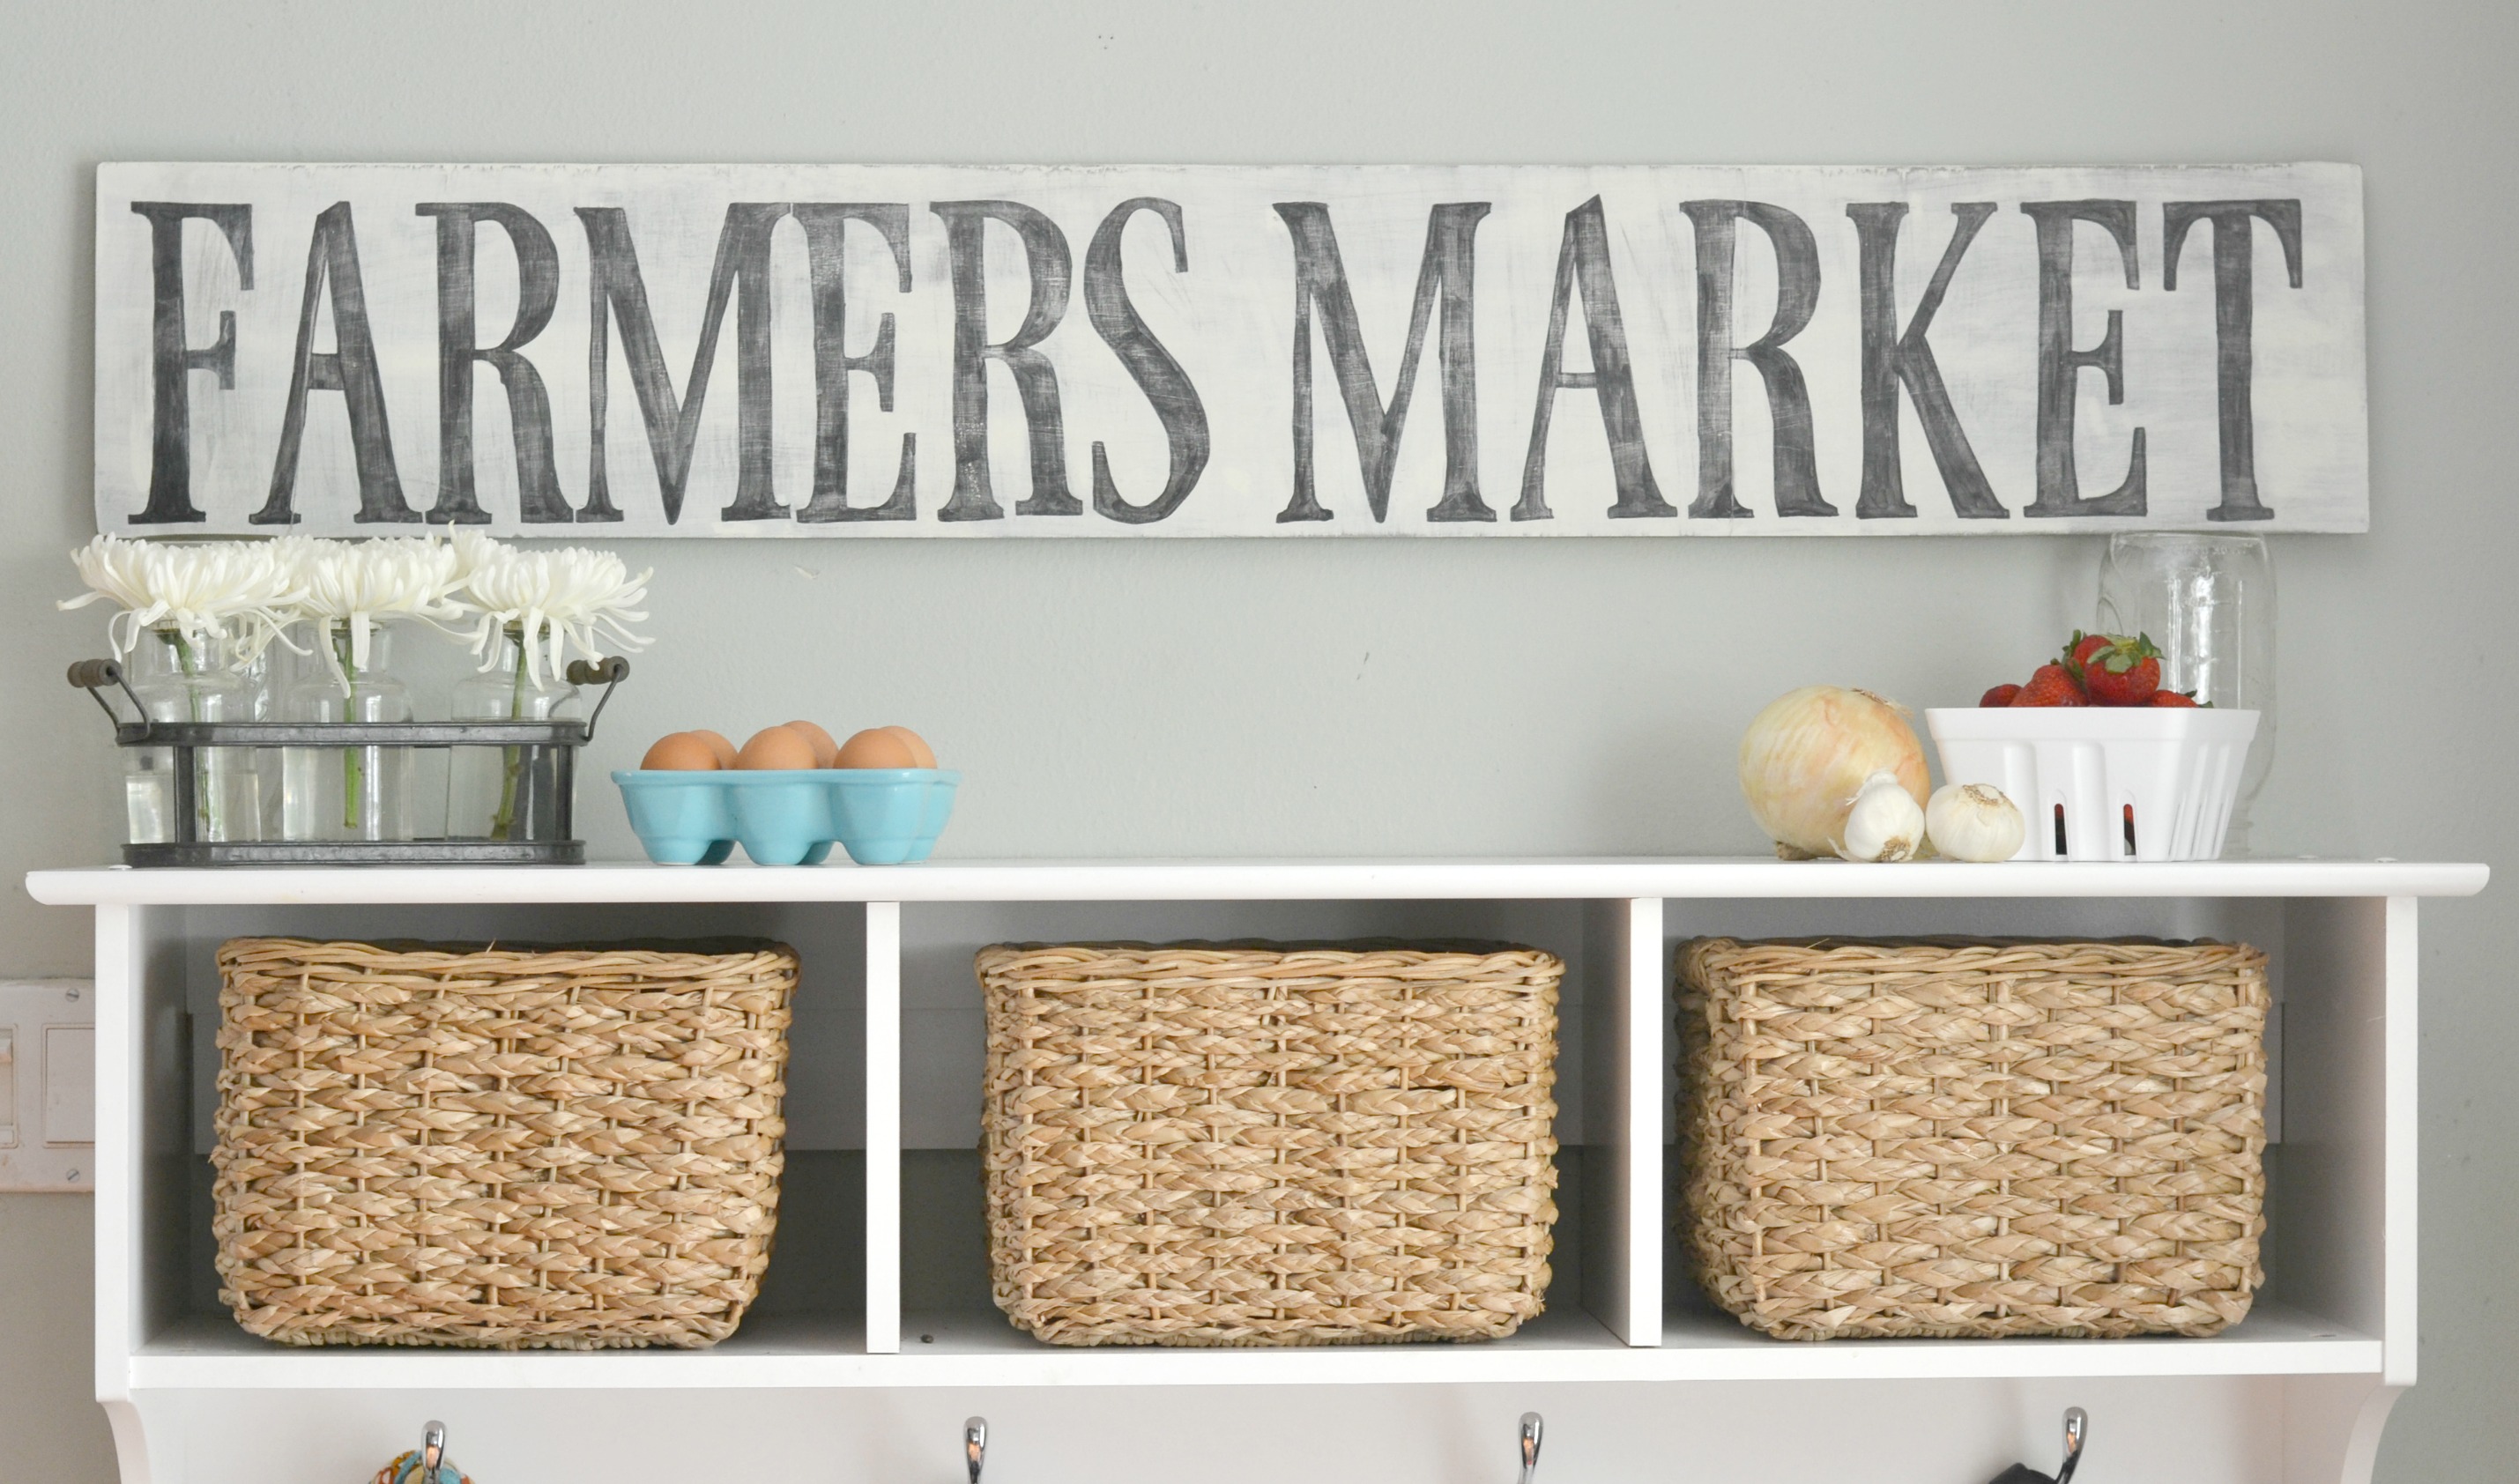
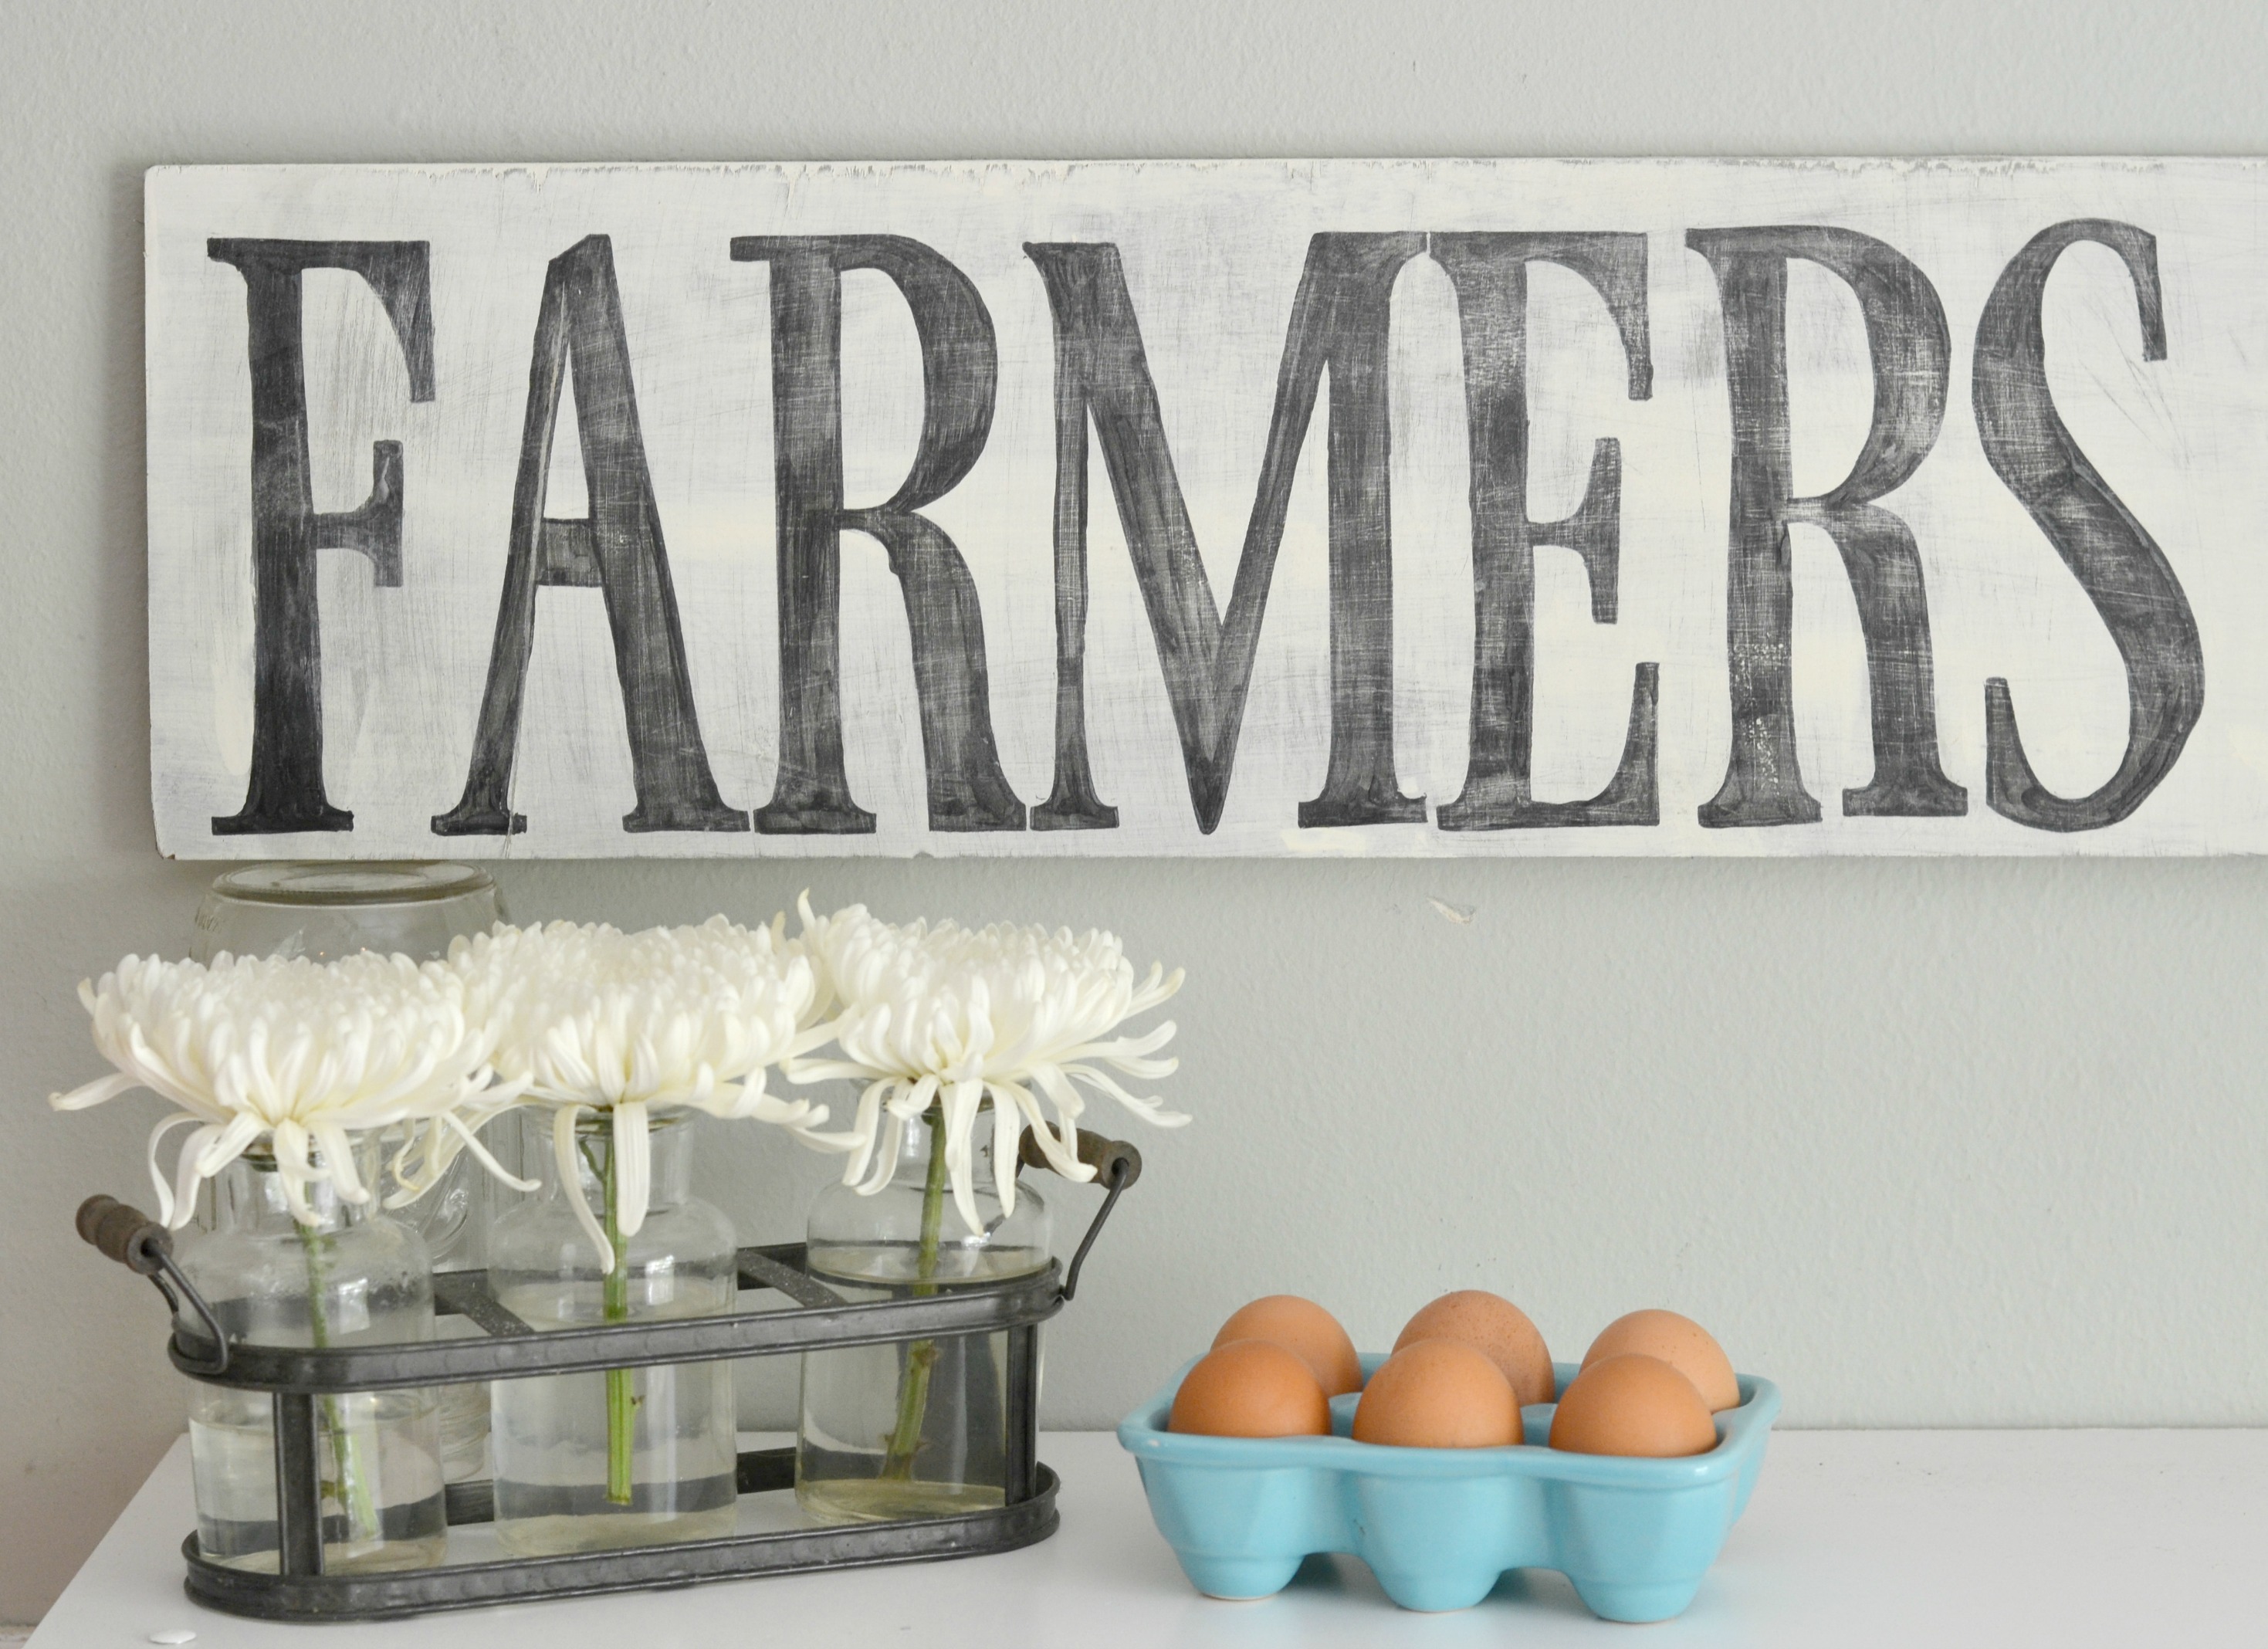
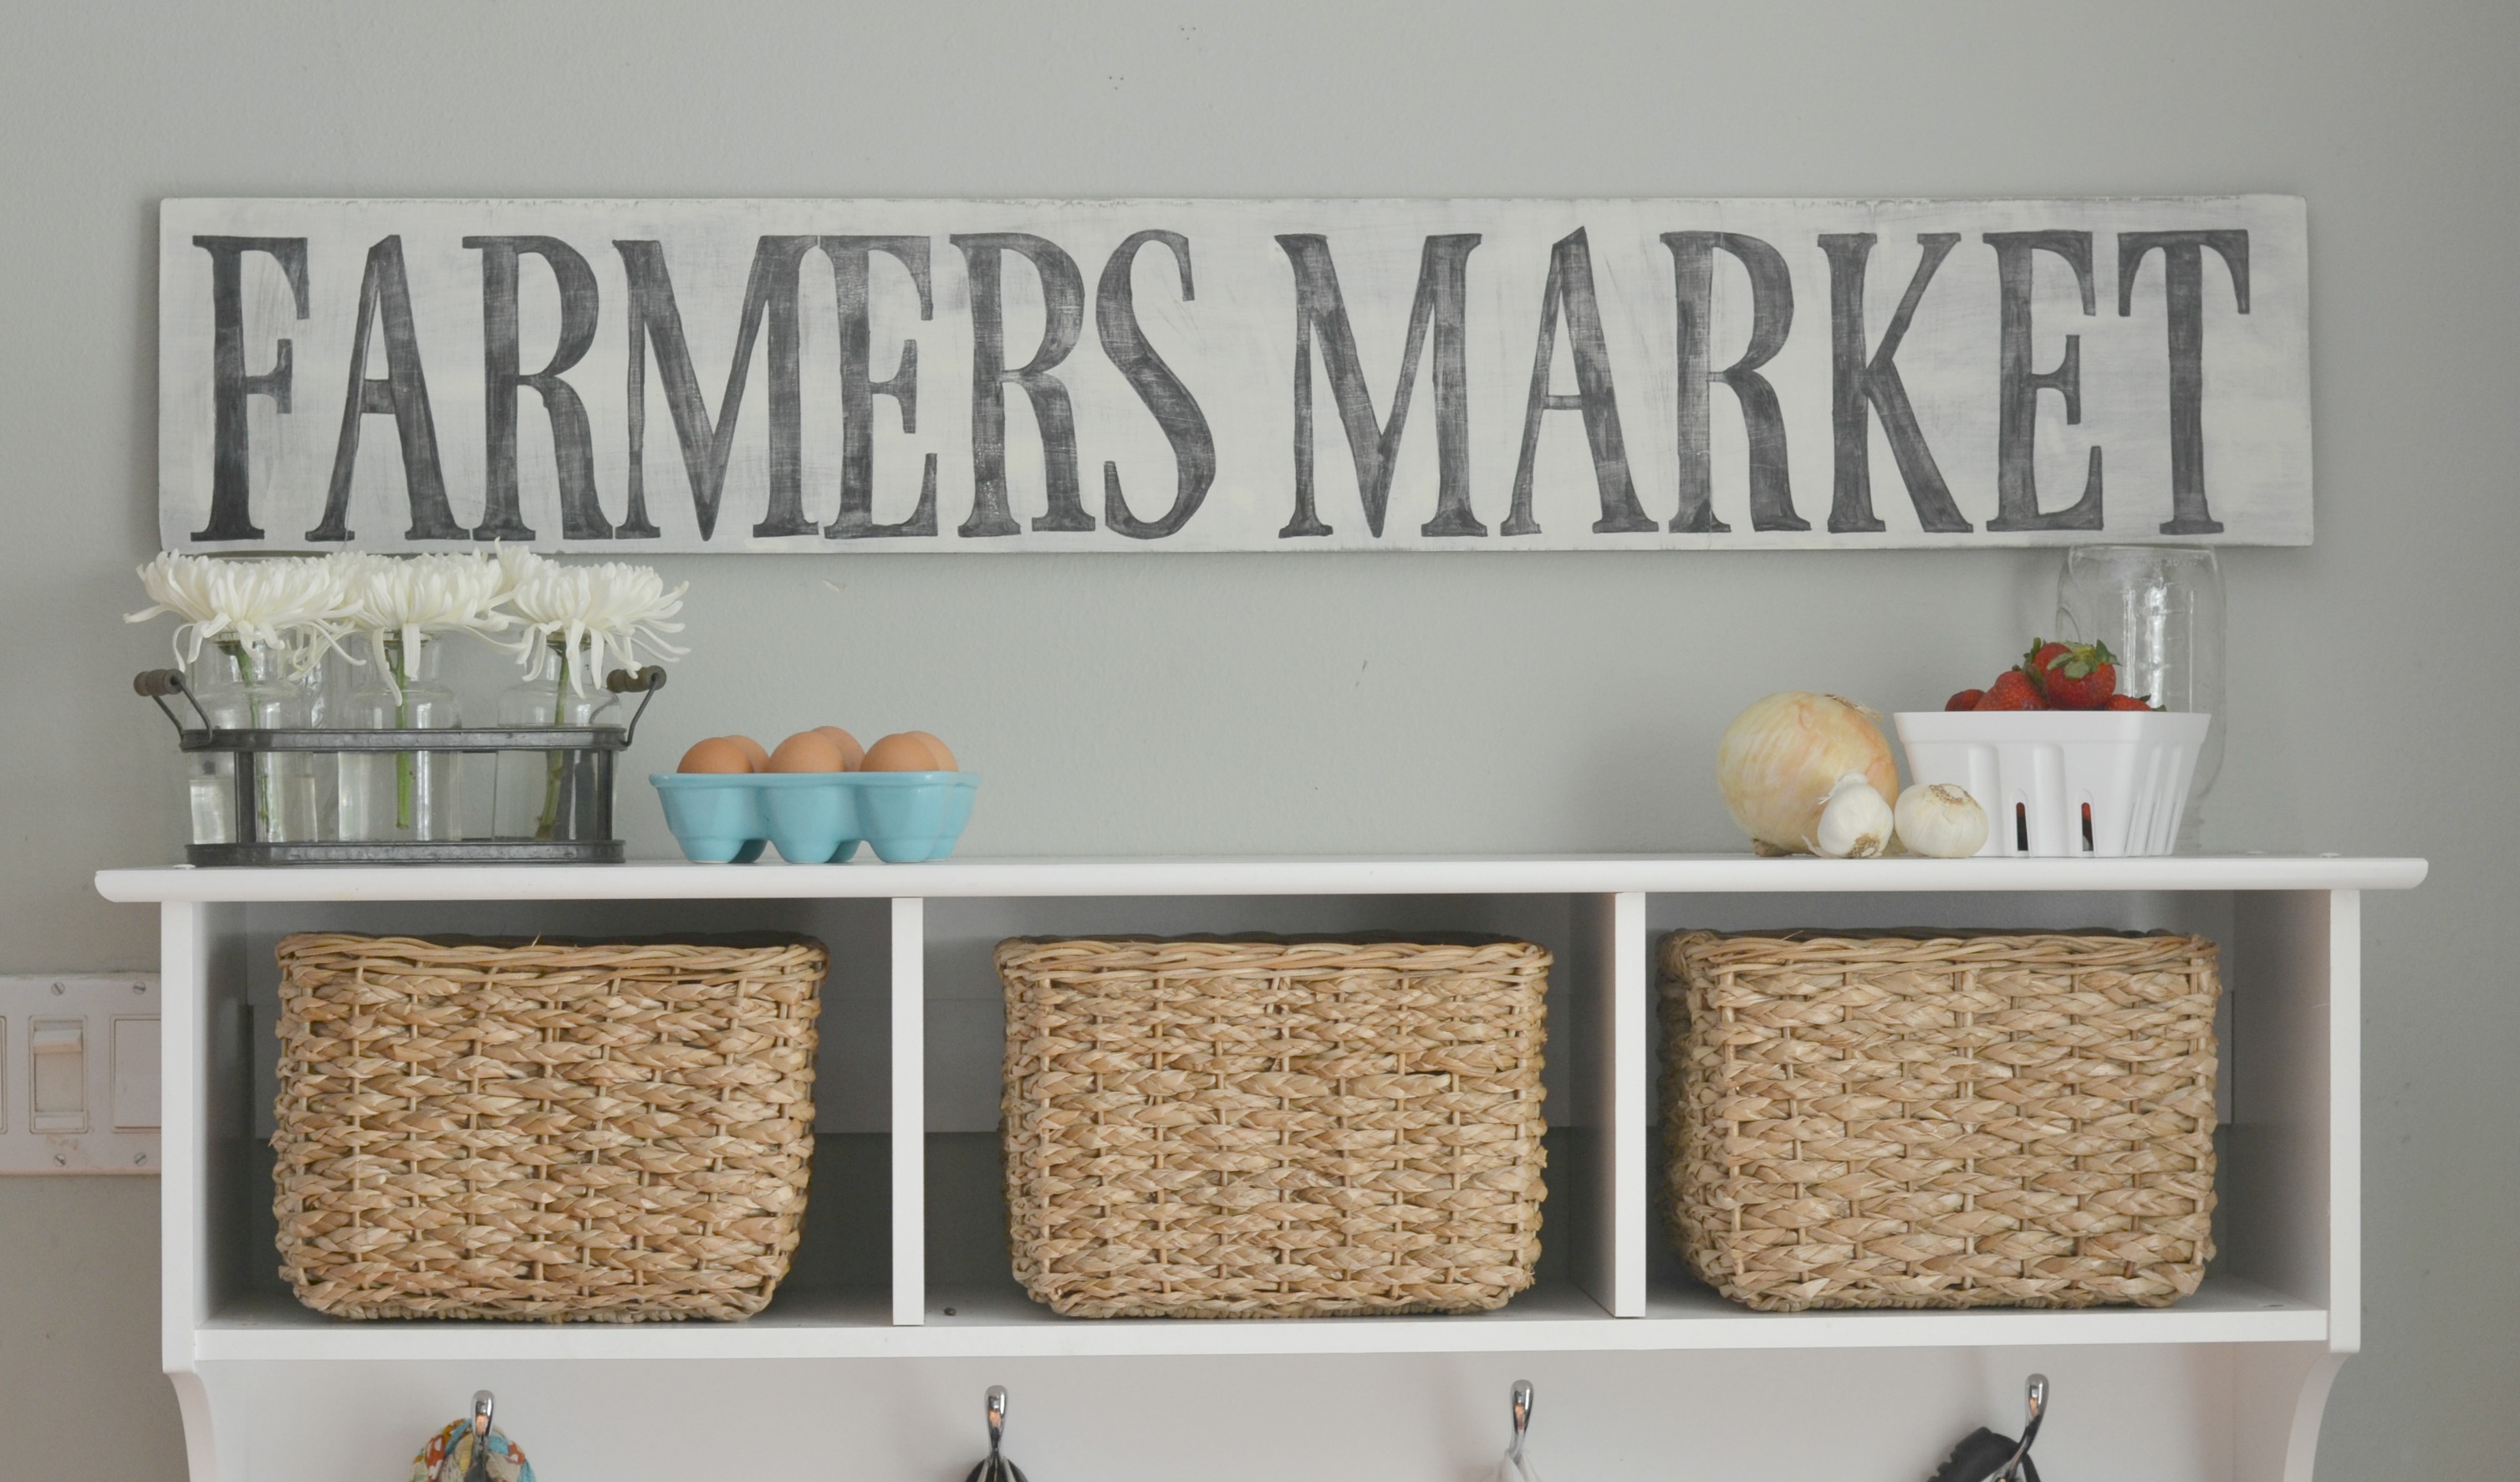
If you are looking to make a smaller sign I have an even easier technique that I found and uses to make this super cute Farmers Market sign for my kitchen. How cute is this?

Easy DIY Wooden Sign - this tutorial is very easy to follow. DIY Wooden sign with frame. Rustic wooden sign with saying.

Farmhouse Sign Technique #2

Here is what you need:

1 piece of plywood- for this project I used a 12inX30in board

Chalk Paint

Foam Paint Brush

Sharpie

Printer

Tape

Favorite Font

Modg Podge

Sand Paper

Acrylic Craft Paint

Small Paint Brushes

Easy DIY Wooden Sign - this tutorial is very easy to follow. DIY Wooden sign with frame. Rustic wooden sign with saying.

Ok, if you think the last sign was easy this one is even easier!

Before we get started, you must sand down this board as well. Remember, we cannot miss this step or the paint will not stick. I just did a quick light coat for this wooden sign, I wanted it to have a rustic feel to it.

Next, choosing a font. For this sign I chose the font Ferrum on Pic Monkey. Determine the size you need your lettering to be flip it mirror image and print it.

Mine looked like this below.

Sign-MA Mirrored

Once you have each letter printed cut off all excess paper. Now, it is time to figure out spacing. Lay out all of your letter across the board and tape them in place. For this technique you must tape them down or your letters will get messed up.

After your spacing is just how you like it take a wet rag and wet the back of each letter. You will want to make sure that the letters are fully saturated and that you can see the letter through the back layer of paper.

Now, before it starts to dry take the end of a sharpie and rub over the back of the wet letters. You want to make sure that your outline each letter with the plastic end of the marker. What starts to happen is that the ink from the paper starts to transfer onto the wood. So stinking cool!

After you have “traced” and “colored” in all letters gently remove all of the letter backings and gently wipe off excess water. Allow sign to dry over night.

The next day, take your sharpie and go over the outline of the letters. Do not worry about the outline being bold, we will distress it later. Now it is time to paint! Using the acrylic craft paint fill in the outlined letters. I again just did one coat as to not make the lettering too bold.

Let dry!

After the piece is dry take the sand paper and gently go over the sign distressing it in some areas and dulling the words in others. This was my favorite part! Once your sanding is complete take your wet rag and gently wipe off your wooden farmhouse sign.

I cannot wait to hang this sign above my kitchen sink. We are in the process of changing our light fixtures in our home and making this more farmhouse rustic industrial looking. This sign is going to be the perfect compliment!

Easy DIY Wooden Sign - this tutorial is very easy to follow. DIY Wooden sign with frame. Rustic wooden sign with saying. 2 easy techniques on transferring graphics.

So there you have it, 2 super easy techniques to transferring graphics to wood and 2 super easy diy tips to creating a farmhouse look wooden sign.

I promise you both of these signs were nearly fool proof. If you are dying for the farmhouse rustic look like I am you will love these!

Happy Friday friends!

Easy DIY Wooden Sign - this tutorial is very easy to follow. DIY Wooden sign with frame. Rustic wooden sign with saying.


Easy DIY Wooden Sign - this tutorial is very easy to follow. DIY Wooden sign with frame. Rustic wooden sign with saying.

Save

0 Shares

Filed Under: DIY and Crafts, Home Decor

« Mommy Style: Summer Edition
Making Time For Marriage On Family Vacation »

Comments

  1. Jennifer Grimsley says

    August 11, 2016 at 12:11 pm

    I love your bible verse sign! Thank you for the instructions. I have made several wooden signs, however, I have never tried this method for letter transfer. I typically trace the letters outline with a stylus that leaves a faint impression and then hand paint all the letting. That causes a lot of hand cramps during the tracing portion! Everything is explained well, but could I request a picture of the back to see how you do the studding? I am a visual learner and this would help me understand this portion of your instructions greatly. Thank you in advance!!

    Jennifer

    Reply
    • Channing says

      August 16, 2016 at 12:10 pm

      Hey Shelby! Let me see if I can get one but it’s really nothing fancy. We just used 2 nails in the back and tied the wire to the nails to hang it.

      Reply
      • Meghan says

        April 5, 2017 at 12:31 pm

        Hi! I was wondering if I pay you, could you make me one just like this. The “he loved us…” one. 🙂
        Meghan

        Reply
  2. Michele says

    August 15, 2016 at 6:28 pm

    What font did you use for the bible verse sign?

    Reply
  3. Anne Gowan says

    September 5, 2016 at 8:40 pm

    I love this and need you to make one for me 😉 Did you have the verse printed out at an office supply store??

    Reply
  4. Jessica {Six Clever Sisters} says

    September 14, 2016 at 5:19 pm

    That is adorable!!

    Reply
  5. Tiffani Paini says

    September 16, 2016 at 5:57 am

    I would also love to know what font you used for the bible verse! Thank you!

    Reply
  6. Theresa says

    September 28, 2016 at 12:37 pm

    Hi! I was able to go on picmonkey to create and image but was unable to figure out the font sizing. You said you used poster size for printing but I’m not seeing that anywhere. What size font did you use? Thank you!

    Reply
  7. Lucinda Foster says

    October 25, 2016 at 8:52 am

    I would love to just use the free printable of your wording but I can’t find a download link. Help! 🙂 Thank you

    Reply
  8. Patti says

    October 31, 2016 at 6:58 am

    ‘Lucinda, To use her free lettering of the Bible verse just right click and “save as”. It will save it as a jpeg. Hope that helps.

    Channing, Thank you SOOO much for sharing the mirrored image and tutorial. This is lovely and I cannot wait to try this method.

    Blessings!

    Reply
  9. Julie Hood says

    November 8, 2016 at 3:43 am

    Using the modge modge letter transfer was a great idea! I currently am making signs sort of like this for my Etsy shop and it’s difficult to get that lettering down correctly 🙂 So glad I found this on Pinterest!

    Reply
  10. Barb says

    January 10, 2017 at 4:57 pm

    I am interested in purchasing the font you used on your bible verse. Can you tell me what it is?

    Reply
  11. Amy says

    March 13, 2017 at 2:01 pm

    ok i’m really confused because I bought 30 in and 32 in studs and they aren’t long enough for the 30×40 in board? Amy I missing something?

    Reply
  12. Pamela Hall says

    March 25, 2017 at 8:54 pm

    What font did you use for the Bible verse?

    Reply
  13. Ashlyn says

    May 22, 2017 at 11:52 am

    This is fabulous!! I cannot wait to use these techniques!

    Reply
  14. Bree says

    November 12, 2017 at 3:20 am

    Were you able to use just a regular printer for this??

    Reply
  15. Anne m Eppler says

    October 22, 2019 at 7:21 pm

    love this thanks,can’t wait to try

    Reply
  16. KB Media Corp says

    October 5, 2023 at 1:48 pm

    Love this farmhouse sign! For top-quality signage, check out https://kbmediacorp.ca/signage-wraps/.

    Reply

Trackbacks

  1. 17 Fab DIY Farmhouse Signs You Can Make Yourself says:
    October 25, 2016 at 11:06 am

    […] Tutorial: http://www.momswithoutanswers.com […]

    Reply
  2. 30+ DIY Rustic Sign Projects: a list of rustic beauties to get you inspired! says:
    February 2, 2017 at 6:01 am

    […] Wooden Farmhouse Sign – These farmhouse signs are so popular right now and really easy to make. […]

    Reply
  3. 50 Wood Signs That Will Add Rustic Charm To Your Home Decor - DIY & Crafts says:
    May 16, 2017 at 8:09 am

    […] Source/Tutorial: momswithoutanswers […]

    Reply
  4. Rustic Charm Home Decor:15 DIY Wood Sign Ideas - Style Motivation says:
    January 28, 2018 at 5:45 am

    […] momswithoutanswers […]

    Reply
  5. Rustic Charm Home Decor:15 DIY Wood Sign Ideas – chuckiesblog says:
    January 28, 2018 at 10:21 am

    […] momswithoutanswers […]

    Reply
  6. 14 Stunning Farmhouse Sign DIY Projects That Are Inexpensive to Make - OhClary says:
    May 5, 2018 at 8:33 pm

    […] A guide for this farmhouse sign can be found here! […]

    Reply
  7. 15 Adorable DIY Vintage Sign Ideas You Can Decorate Your Home With – 2018 designs says:
    July 14, 2018 at 5:32 pm

    […] Tutorial […]

    Reply
  8. 15 Adorable DIY Vintage Sign Ideas You Can Decorate Your Home With – art designs says:
    July 14, 2018 at 6:43 pm

    […] Tutorial […]

    Reply
  9. 41 Easy DIY Rustic Wood Signs That Will Give Your Home Decor Character says:
    May 15, 2019 at 6:35 am

    […] Tutorial: http://www.momswithoutanswers.com […]

    Reply
  10. Farmhouse Sign Ideas – by Mikel Tadeje says:
    October 26, 2019 at 8:10 am

    […] Source: https://momswithoutanswers.com/easy-diy-wooden-farmhouse-sign/ […]

    Reply
  11. 25+ Creative DIY Farmhouse Sign Ideas & Tutorials For 2019 says:
    November 12, 2019 at 2:44 am

    […] Source […]

    Reply
  12. 7 DIY Wood Signs For Bedroom Ideas - Make Cents Woodworking says:
    May 11, 2020 at 4:29 am

    […] this tutorial to start your […]

    Reply
  13. 29 Farmhouse Sign DIY Ideas That Are Inexpensive To Make says:
    November 7, 2020 at 1:52 am

    […] Via Momswithoutanswers […]

    Reply

Leave a Reply Cancel reply

Your email address will not be published. Required fields are marked *

Hi, friends! I’m Channing. I am mom to 3 amazing girls and wife to my fire fighting hubby, Eric. I loving sharing all things mom life related – recipes, DIY’s, real mom talk, crafts and more! 

Insta-Moms: @momswoa

Instagram post 17951785348338518 Happy 4th from these little cuties. It looks A LOT different this year but we are still having fun.
.
.
.
#happy4thofjuly #happyfourth #fourthofjuly #redwhiteandblue #momblog #houstonmomblogger #momofgirls
Instagram post 17856710153004179 #blackouttuesday
Instagram post 17864637601827512 This is what happens on day number 3,568,743 of quarantine: ice cream sundaes for DINNER. We have been spending endless time together and decided it was time to start a new family tradition, so we picked up the new DIY Sundae Kit from @baskinrobbins! The kit comes with 2 pre-packed quarts of ice cream, 3 toppings, an entire can of whipped cream and cherries! Ice
cream for dinner will now be a weekly staple. The kids are definitely not complaining! It’s a fun day with a Sundae! 
Comment below and tell me your favorite Baskin Robbins flavor!

#QuarantineCreations #IceCreamforDinner #FamilyTraditions #ad
Instagram post 17855065096958471 Some of my #DisneyMagicMoments have been with some special moms in my life! So, I’m playing along and sharing some of these moments with you.

I have spent time with old friends and new and the magic is always there. 
If you scroll back far enough, you will see my first Disney experience and the moment I fell in love with Disney with my own mom! 
I would love for you to play along and share your favorite Disney moments with the moms in your life! Don’t forget to use hashtag #disneymagicmoments! I tag @pixiemousemichelle, @fivefortheroadblog and @mrsblinks! 
Happy Mother’s Day! 😘😘
Instagram post 17873430769680209 Happy Cinco de Mayo! 🌮 What is your favorite Mexican dish?

I could eat Mexican for every meal of everyday! If your looking for the perfect recipes to make for dinner, I’ve got you covered. 
Head on over the the blog for all of my favorite dishes! These enchiladas NEVER disappoint! I promise you will LOVE all of these recipes! 🎉
Instagram post 17885629336528535 May the 4th be with you! We cannot wait for the day that we get to be back at Star Wars Galaxies Edge. Batuu, we miss you! #maytheforcebewithyou #may4thbewithyou #disneycreators #batuu #bluemilk #wemissdisney
Instagram post 17850899390014309 Disney is challenging us to share our first pictures with characters! I had to join in the fun and it was the best trip down memory lane. Disney has been threaded throughout my entire life. I pulled a few of my most favorite memories over the years. From partying in the streets during the most epic dance party and meeting our most favorite princesses to me being a kid at Disney myself. Oh, I also had to add a picture of Cinderella’s Castle. She really is the most beautiful cast member of them all! 
@waltdisneyworld we miss you more and more each day. You’ve brought us joy beyond words and we cannot wait for the day when we get to walk down Main Street USA again! 
Ok, now it’s your turn. Find your old photos of your favorite Disney characters and share the magic. Also, don’t forget to tag me. I want to see all your memories too! 
@pixiemousemichelle @ericaligenza and @prettyprovidenceblog it’s time to share yours!#disneymagicmoments #myfirstdisneycharacter #disneycreators #disneyfamily #disneykuds #disneyworld
Instagram post 17904777073435611 EASY EASTER SUGAR COOKIE BARS! [AD] With Easter looking a little different this year, I teamed up with my friends at @hersheys to create a fun Easter treat using items you probably have in your pantry!
These Easter Sugar Cookie Bars are so easy to make. Store bought sugar cookie mix and cute colorful icing is the perfect foundation for @cadburyusa eggs and @reeses eggs. 
Looking for more treat ideas? Check out the fun recipes at https://Hershey’s.com/kitchen/en_us/home.html

Comment below and tell me your favorite Easter recipes! #cadburyusa #reeses #eastertreats #springdessert
Instagram post 18019712191263346 I’m joining my friend @andhattiemakesthree for #happymondaymemory to share some joy and fun around here!
.
.
.
Let’s take it back to the #happiestplaceonearth and our time in Star Wars Galaxy’s Edge! Y’all, I don’t even have words for how amazing it is. And #riseoftheresistance is everything! Check out our video to see for yourself. We miss you @waltdisneyworld and can’t wait to make more memories soon!
.
.
.
Now it’s your turn! Share your favorite memory and let’s spread some joy! #evereveambassador #disneycreators #starwars #disneyhollywoodstudios #stayhome
Follow on Instagram
This error message is only visible to WordPress admins

Error: API requests are being delayed for this account. New posts will not be retrieved.

There may be an issue with the Instagram access token that you are using. Your server might also be unable to connect to Instagram at this time.

As Seen On:

Keep in Touch

  • Bloglovin
  • Email
  • Facebook
  • Instagram
  • Pinterest
  • Twitter

Recent Posts

  • Copycat Disney Churro Ice Cream Sandwich
  • Teacher Approved Educational Resources for Kids
  • 20 Fun Things To Do At Home with Kids

Blog Archive

Copyright © 2025 · Genesis Framework · WordPress · Log in

This website uses cookies to improve your experience. We'll assume you're ok with this, but you can opt-out if you wish.Accept Read More
Privacy & Cookies Policy

Necessary Always Enabled